

I mentioned in a previous blog post that hotels and Airbnbs with bold interiors were charging more. To be clear, they were charging more not because they had to, or because the spaces necessarily cost more to create. They were charging more because people were willing to pay more to experience them.
Of course, like with any interior style, the amount you can spend is basically endless. But at the risk of talking myself out of future bookings here; there’s also a huge amount people can do themselves on relatively limited budgets. The main things I have learnt are:
I learnt most of this when I got my first flat. After renting for my entire adult life and not being allowed to put up much more than a poster, I suddenly had complete freedom to go a bit nuts design-wise. We were lucky enough to end up with a huge blank canvas of a flat (apparently other buyers thought it was “too big”, which made absolutely no sense to me).
If I’m honest though, the scale of it was intimidating at first. So rather than trying to tackle everything at once, I focused on smaller areas and features over time. Looking back now, that was probably one of the biggest lessons I learnt. A space evolves gradually. You don’t need to do everything in one massive expensive hit.
I’m a huge fan of Acid House music (who knew?!) and took a lot of inspiration from dance music culture, especially the legendary Manchester nightclub The Haçienda. Our flat had lots of exposed beams, so the obvious thing to do was paint some of them in hazard-style chevrons inspired by the club.
This was cheap and relatively straightforward, just time consuming. A trip to B&Q for paint, brushes and the absolutely essential Frog Tape was pretty much all that was needed. One thing I learnt quite quickly was that colour choice matters massively. A lot of yellows available off the shelf tend to lean more “sunflower” than proper acid/smiley-face yellow, but you can usually get custom shades mixed without spending a fortune.
The interesting thing was how much impact something so simple had on the space. Instead of hiding structural features, it highlighted them. It gave the flat personality almost immediately. And over time I painted more beams in different vivid colours. That was probably the point where I realised memorable interiors often aren’t about luxury materials at all. A lot of the time they’re about confidence, colour and committing to an idea.
The same thing happened with our living room feature wall. I painted it sky blue to tie into the Haçienda colour palette, but later stumbled across Mario decal stickers online. I realised I already had the perfect background for the old Mario Nintendo game screen, so all I really had to do was add the decals over the top. Again, very little actual cost involved, but it completely changed the feel of the room.
Over time, one of the unexpected benefits of doing things this way is that you slowly build up resources for future projects. Spare paint colours, leftover materials, tools, ideas and techniques all start accumulating. At the same time, you also begin developing a clearer sense of your own design personality and what you actually enjoy living with.
The dining room chairs were another example of this approach. I found them in Ikea’s reduced section and customised them myself using paint and vinyl decals. Looking back now, I probably would have had the confidence to paint the entire thing from scratch, but at the time I was still figuring things out. Some of the simpler detailing was done using home made stencils and spray paint to create a cleaner finish, although honestly the same effect could probably be achieved using a sponge and a bit of patience.

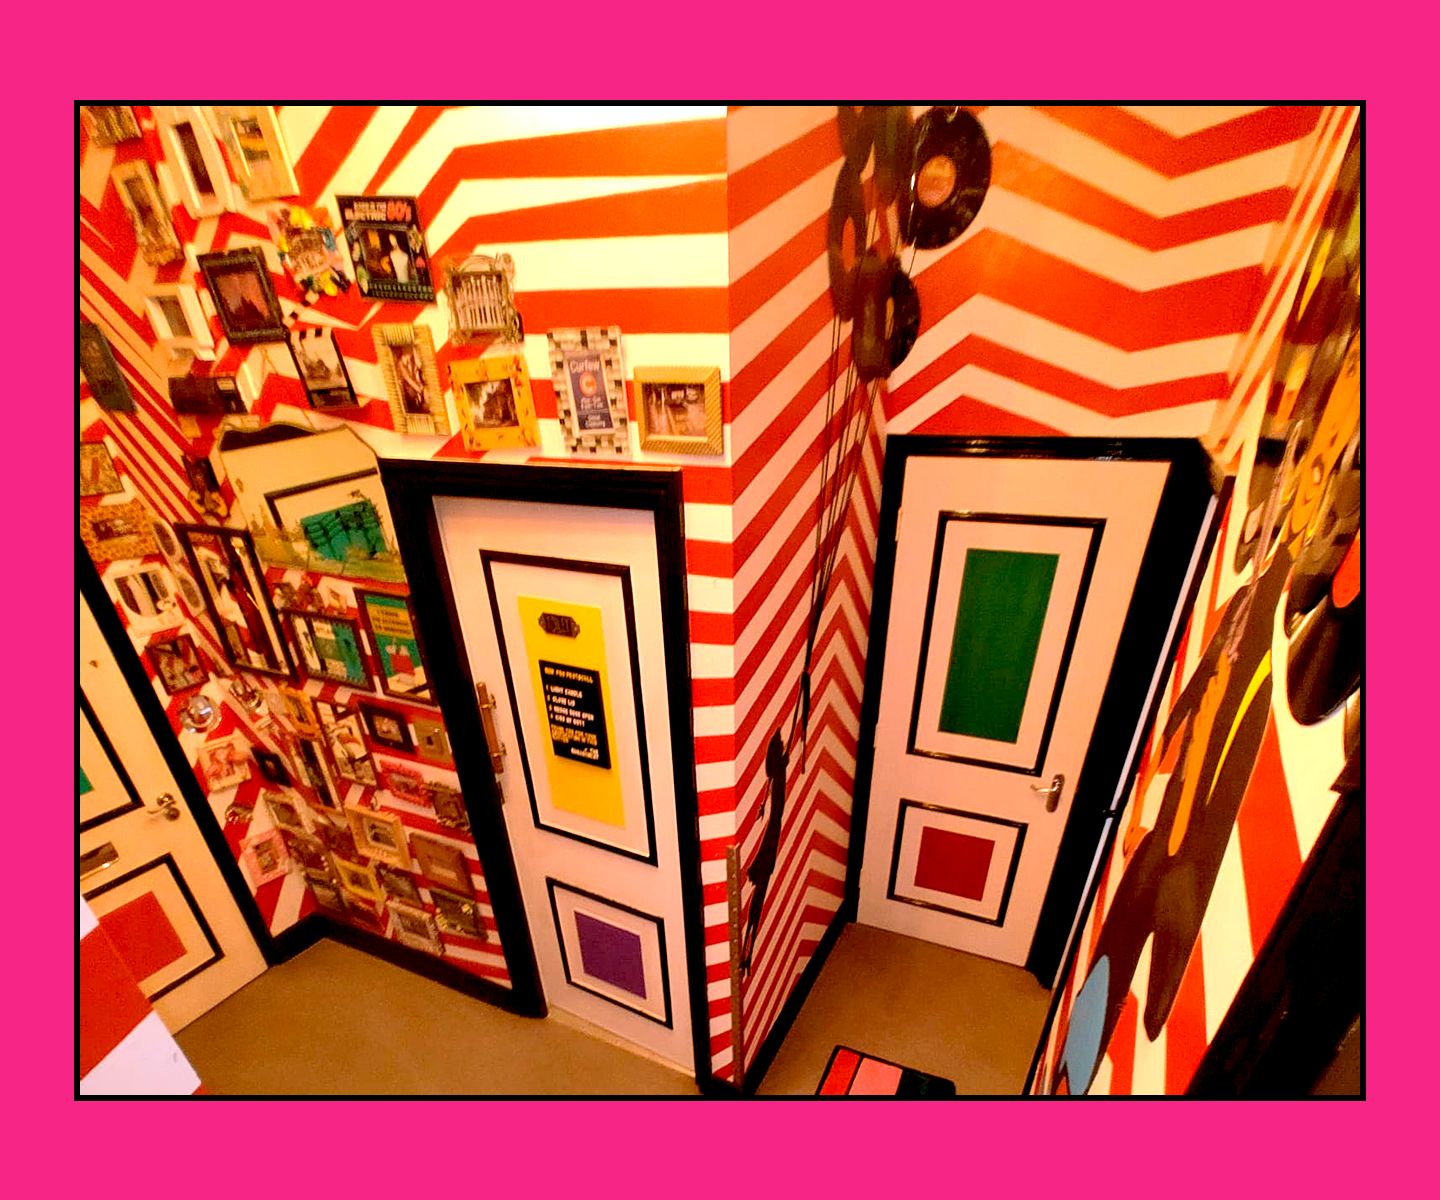
The hallway followed a similar logic. Red and white paint, Frog Tape, a zig-zag stripe design and a lot of patience. The material list was incredibly simple, but the impact was huge. Likewise, our rustic industrial-style bathroom used relatively cheap materials like corrugated metal and reclaimed floorboards. The key thing was simply finding installers willing to lean into the idea rather than defaulting to the safest possible option. Andthis didn’t end up costing any more than a bog standard, off the shelf bathroom.

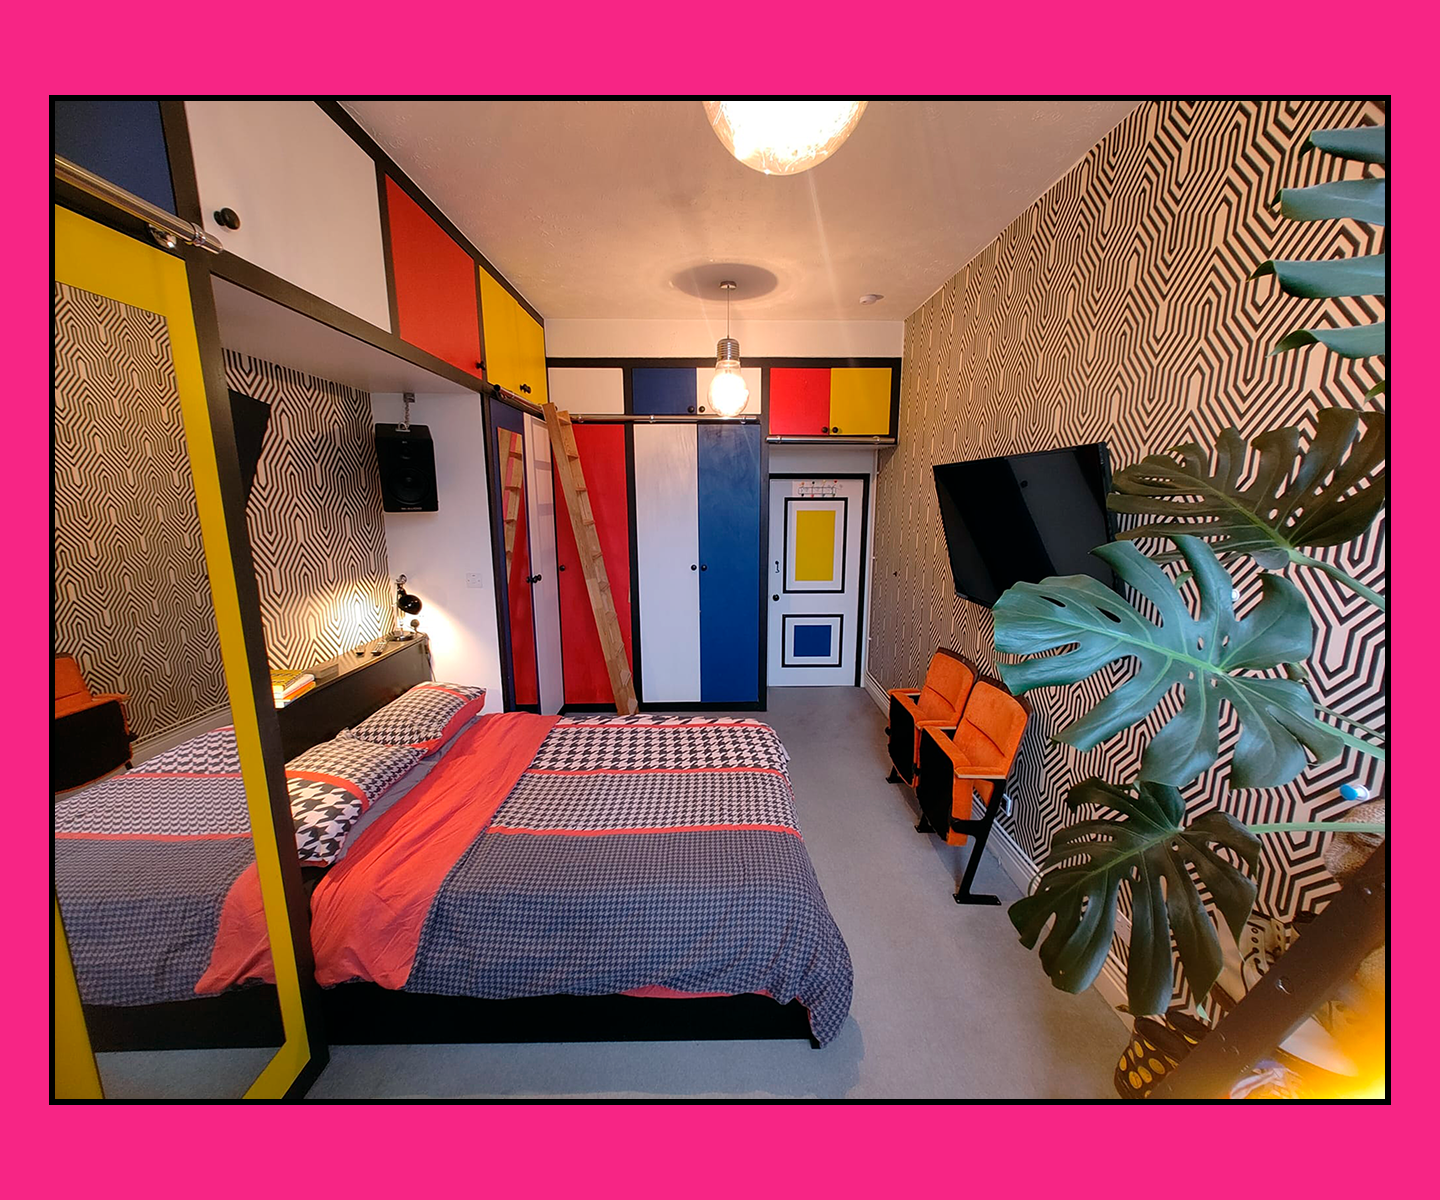
The fitted wardrobes in the bedroom were another relatively straight forward concept. Black framing acting almost like an outline, with vivid primary colours used on the doors. Again, visually bold, but structurally simple and completed with the help of a local joiner rather than some impossibly expensive bespoke specialist.
Some of the more creative ideas came later once my confidence grew a bit. One of my favourites was a multicoloured mannequin fitted with strobes and a sound-reactive disco bulb. I bought the mannequin cheaply when a department store was closing down, attached the strobes myself and wired the disco bulb through the body using a cheap flex cable. The whole thing was painted using what had by then become my ever-growing stockpile of leftover paints from previous projects.
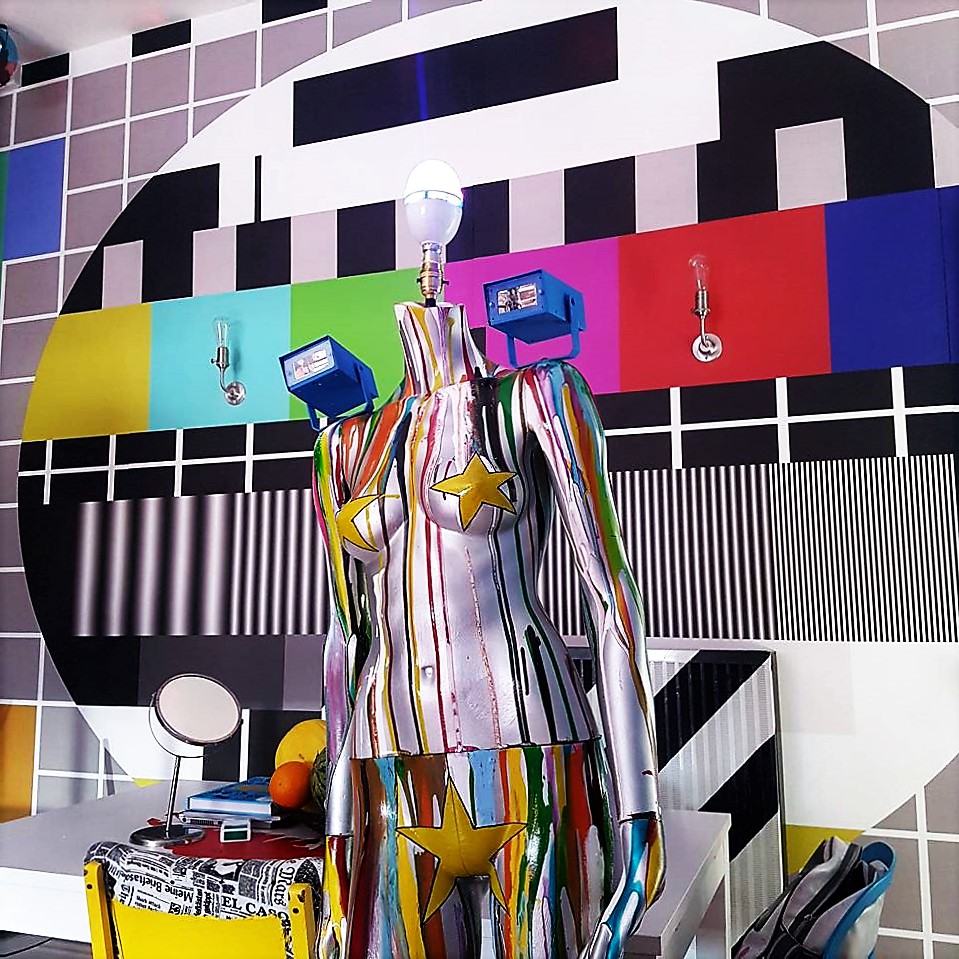
It was time consuming, and almost certainly not ideal to build in a flat with cream carpets and no dedicated workshop space. But that was all part of the learning experience. Looking back now, I think those more imaginative DIY projects taught me more about creativity and problem-solving than anything else.
Probably my favourite project of the lot though was an old wooden-doored fridge sourced cheaply from Gumtree during lockdown. This was to add to my Spinal Tap-themed home bar, “The Electric Banana”.
I repainted it and added genuine Marshall amplifier parts and branding to turn it into something resembling a giant guitar amp. And yes, all the dials go to…11.
The actual costs involved were relatively modest. Like most of these projects, the biggest ingredients were time, experimentation and a willingness to try something a bit different rather than just settling for the standard option. And personally, I think it was at least one better than a normal fridge.
Or, if you’d rather avoid years of experimentation, bodged DIY and endless scrolling through Gumtree … you could always hire a designer. Preferably me!

Another useful thing I discovered over time was how cheap projectors have become. If you want to create large-scale murals or complicated wall graphics, you don’t necessarily need to be some incredible freehand artist. You can now pick up small projectors for around £40, project designs directly onto a wall from your phone or laptop, trace them lightly in chalk and paint over afterwards.
Again, the biggest challenge usually isn’t money, it’s patience and time. A lot of bold interiors are actually far more achievable than people think once you stop assuming everything needs to be professionally manufactured or bought exactly as is.
A lot of the detailing throughout the flat also came from Ebay, Gumtree and local vintage shops. A cheap old wooden ladder became a plantstand after being repainted with leftover wardrobe paint. The home bar and DJ booth were both sourced second-hand for a fraction of what people probably assume they cost.
Looking back now, I think the biggest thing that flat taught me is that good interiors don’t necessarily come from massive budgets. More often they come from experimentation, personality, patience and a willingness to customise things rather than leaving them exactly as they came out the box.
Nothing in our flat was an expensive luxury piece. They were painted, repurposed, thrifted, customised or built gradually over time. It was essentially Acid House ground zero, and also the thing that properly shaped me as a designer.
